Tuesday, July 18, 2023

A Little Cottagecore Vibe In My Booth

I absolutely love cottagecore!  The browns, the greens, nature, books, floral, just everything about this dΓ©cor that takes us back to our roots.  Especially mine, growing up a country girl.  The outdoors was my home.  I have bits and pieces of this aesthetic in my family room, along with the heirloom pieces we've inherited.  My vintage booth is an extension of me and the things I love.  Just wanted to share a couple photos of my booth that I captured recently.

My neighbor's hydrangeas are so pretty every year.  Whereas mine have all passed on.  I love that she allows me to cut and save her blooms.  These pretties make for a lovely cottagecore vignette. 🀎

Little brown bottles are adorable with a sprig of dried floral.  My recent favorite is the little clear bottles with corks that hold tiny chamomile dried flowers. 😍 So fun and cute! 


What about you?  Are you a fan of the cottagecore look? πŸ„


Monday, July 17, 2023

Oklahoma 100 Mile Yard Sale Tour Find

My Vintage Sisters and I hit the Oklahoma 100 Mile Yard Sale Tour back in May.  I came across this pretty, solid piece of furniture for $3.00! Night stands and dressers sell well for me so of course this one was loaded in the junking jeep.  

It needed a good scrub on the metal legs and the wood too.


The top corner had a pretty good size indention in it, which I believe was a deterrent to most people shopping this sale.  


I sanded down the top and painted it with Waverly Ink chalk paint. A couple coats of wax and she's as good as new! 


This beauty only set in the booth for a couple of weeks before it sold for $55.00.  I was happy as this was the least amount of time I've ever spent on a piece of furniture.  And I sure hope the new owner is happy as well.  

It's nice to be back to blogland... I really have missed it.  I'm looking forward to documenting my makeovers here as I enjoy them so much.  Thanks for stopping by and have a delightful week!


Saturday, December 31, 2022

Been away a little while... coming back soon...

 Goodness sakes... what is this... once a year posting stuff?  Man, I miss my blog so very much.  I'm not sure why I don't take more time for it?  The plan was to document all the projects I'm working on.  And there have been many, many projects in the works.  Time to make some 2023 changes... going to blog at minimum once a month.  I love my little side business lots... not only does it bring me much joy but it is so relaxing for me.  I'll be back soon for the first post of the year with a recent project I completed.  I do miss my blog peeps so much... not sure who is still around blogland though.  Hope to re-connect with everyone soon and looking forward to meeting new blog friends! 😊

Thursday, December 30, 2021

Living Room Sofa Table

 It's been awhile since I've been around blogland but I wanted to capture some of the projects I've been working on this past year.  I've been looking for a sofa table for the living room for a couple of years but just haven't found exactly what I wanted.  I thought it would be easy to find a plain, simple table with no drawers or fancy features... but that wasn't the case.  Ugh!  I was determined to find one though, and I did just that at the spring show at The Old Chicken Farm Vintage Barn Sale in Jones, OK.  Finally.


It was a little rough but just what I had been searching so long for so it came home with me for $20.  My husband helped me fix the warped top by wetting it, gluing it, clamping it, and keeping it wet for a couple of days.  It worked like a charm!


Our Living Room has been in the primitive patriotic style for many, many years.  Even though I've been renovating the rest of the house, the patriotic will remain because it is one of our favorites.  So the table got a coat of red chalk paint.

It was a little bright for the primitive patriotic so I used a dark wax on it (instead of my go-to clear wax) to tone it down a bit.


For less than $30, I was able to have the sofa table I had been searching so very long for.  We love the way it looks in the Living Room!  And it's another piece to mark off my list, yay!

I hope to be back soon to document more projects that I've been working on for my booth and our home.  Sometimes we forget the time and energy that goes into these pieces that we bring back to life!

Wednesday, February 19, 2020

Tulip Music Page Cones

Don't you just love creativeness that's shared on the internet?!  Of course, Pinterest is my all time favorite place for inspiration.  What about you? When I came across these adorable flower bouquets, I knew that I had to make them for Spring for my booths.

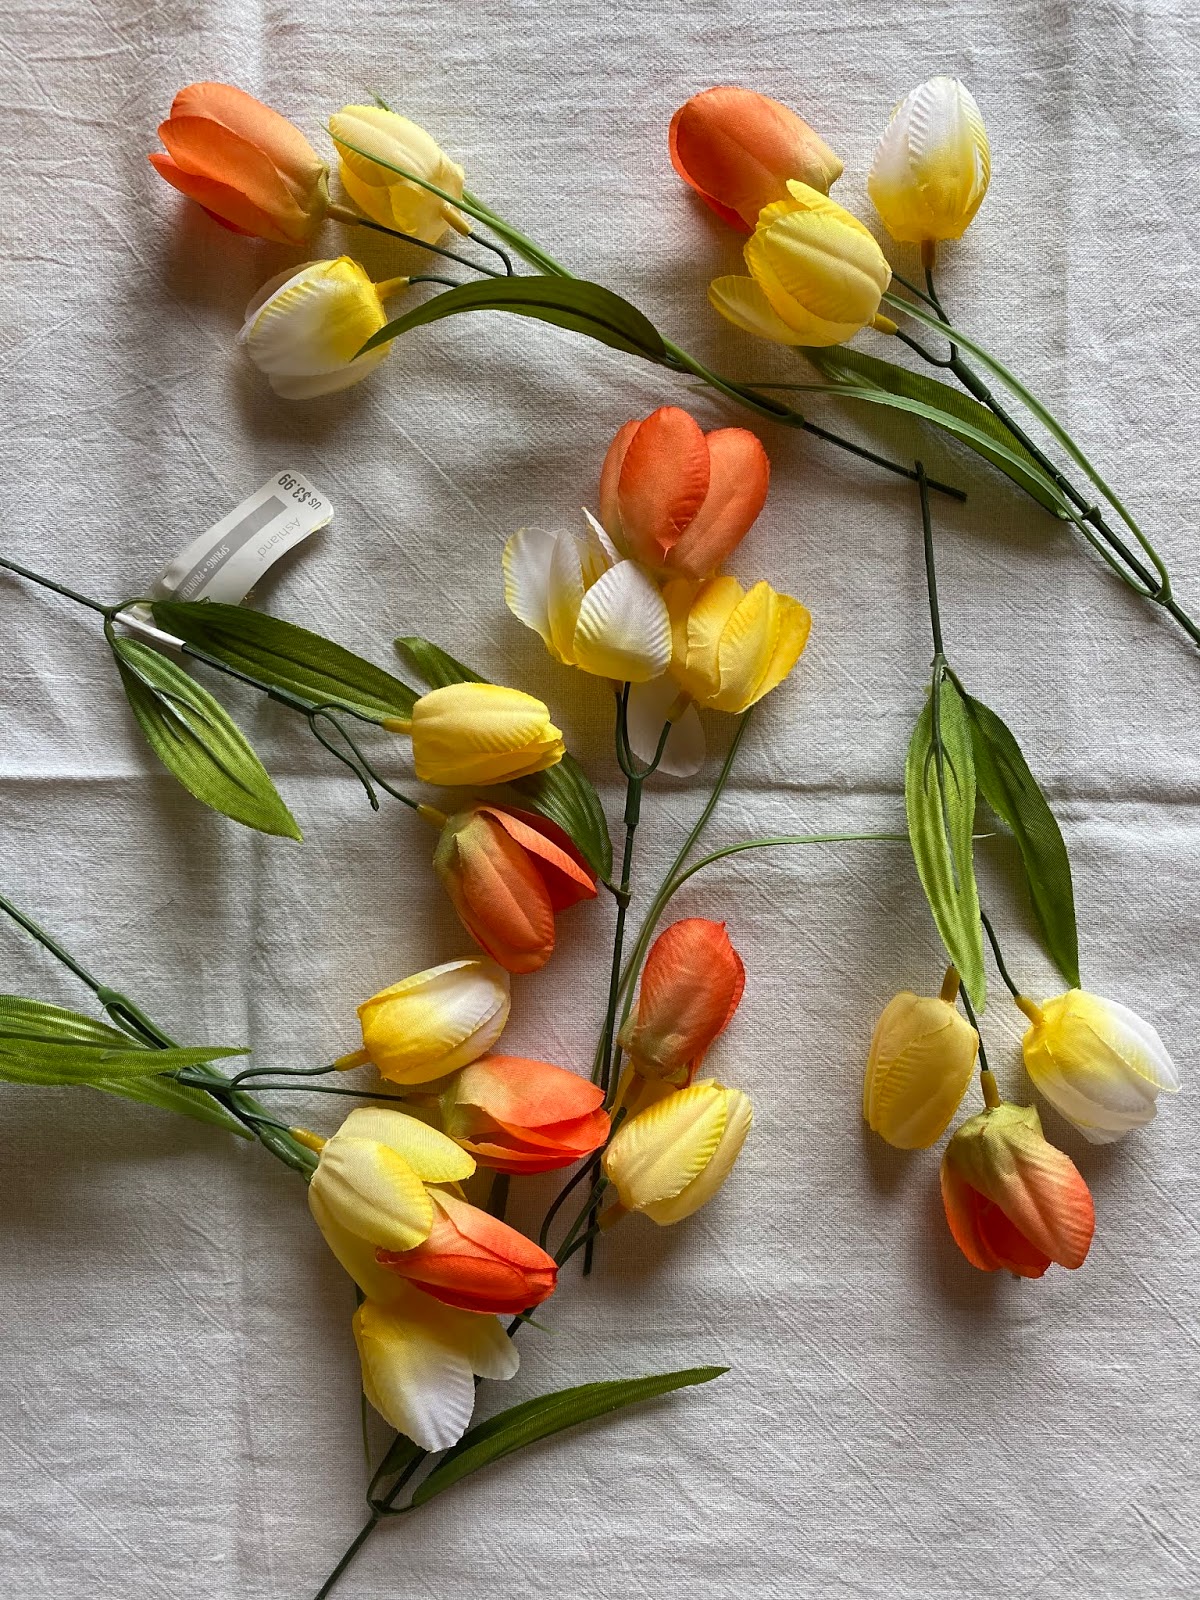
I also knew the exact flowers that I wanted to use.  Michael's had been advertising these beautiful bouquets of tulips for only 99 cents each!  They are regularly $1.99 each which is still a great deal but when you are going to re-sell, you want to get your supplies as cheap as possible. I had already cut them apart in this pic, but you get 8 stems of 2-3 blooms each!

At that wonderful price, I had to get one of each color!

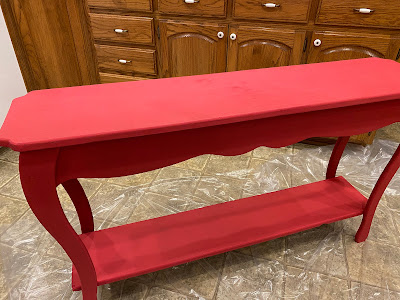
One of the things that I'm doing in 2020 is using supplies I have.  Especially glue and paint as I seem to be quite fond of them and seem to have way more than I need.  As can partially be seen here on one tray of my work station has nothing but glues in each section of the tray.

I'm very much old school and when I find something I really like, I remain loyal. As it is with Aleene's tacky glue.  I first used it in the 80's and almost 40 years later, I'm still using it!  It's just hard to go wrong with Aleene's.  Sidenote: Did any of you used to watch her TV show?  Oh, how I used to love to watch her!  Even Dollar Tree now carries my favorite, yay!

I will admit to a new found favorite that my friend turned me on to last year.  Beacon's 3-in-1 is also an amazing glue that can be used on a variety of surfaces.  I especially like it for paper and lighter surfaces.  I always get it at Hobby Lobby or Michael's with a coupon.  But it is only $6.99 a bottle.

Using this amazing glue stick that was gifted to me by a friend (so amazing that now I have to go buy some-- ugh!), I put glue down one side of the hymnal music page and rolled it into a cone. 

Remember... I cut each stem off so I ended up with 8 stems per bouquet.  I used 2 stems for each cone so I was able to get 4 cones out of one bouquet!  

Using these amazing glue dots (totally wish I knew where they came from because they are strong!), wrapped around the two stems, I pushed them down into the cone.  I would have used Aleene's here but these have been sitting in the glue tray of the work station for some time now.

One of my favorite ribbons to work with is crinkled seam binding.  The colors are so pretty, so vibrant, yet it has such a nice vintage touch.  I just love it.

Normally, I would use glue here also.  But in keeping with the 'use what I have, use it up' theme... I went with this double stick tape to stick the ribbon to the back of the cone.  And it worked great!

I'm a little biased but I think they came out super cute.  Super cheap.  Super quick and easy.  What more could you ask for?!

Every single time I make something, I always give it away or sell it and not keep one for myself.  Well not this time!  I kept one of my favorite colors and started my spring decorating.

I had SO much fun making these cute little cones!  I was surprised at how quickly I was able to put 24 of them together.

In the end, 23 went to my booth and they started selling right away.  I guess I'm not the only one anxious for Spring!  =]

29 more days until my favorite season of all is here!  Sure can't wait!  Have a delightful week my friends~

Saturday, January 25, 2020

Linens & Lavender

I'm a sucker for vintage linens.  Are you?  The graphics on vintage tablecloths make my heart skip a beat!  I am drawn to their gorgeous colors and beautiful patterns.  The same for vintage sheets... I love to feel their softness.  Oh, and hankies!  I am saving my favorite full color pieces to make curtains for my junk room.  Can't wait till I have enough to make even one curtain!  What about those amazing embroidered linens that can be found around here a dime a dozen.  So very sad.  I salvage ALL the ones I come across.  I try my best to clean them but if the stains just won't come out or the piece is beyond repair, then I make little lavender sachets out of them.

I had a pile of white linens that I washed but the stains did not come out.  So I put them in a tub of hot water and bleach.  I let it set overnight, stirring every 4-5 hours.  The next day I dumped it out and let them soak in a tub of hot water only, stirring every 4-5 hours.  I was amazed at how pure white they all were!  Every single piece came out clean.

I separated the plain linens from the ones with a design.  The linens with even a little design will go into the booths.  But the plain linens got a little dressed up before they went to the booths.  With lavender.  And twine.

Simple, yet elegant.  


This spring loving girl is ready for all the pretty flowers!  I was shocked to see our Daylilies already trying to push through.  I discovered these on January 8... at least one month early as we normally find shoots at the beginning of February.  We've had a warm winter this year so I'm guessing these babies are confused that we haven't had much frost yet.  I hope they survive through the rest of winter.

I hope I can survive the rest of the winter. πŸ˜‚  These old bones and arthritis are ready for Spring also.  It's our favorite time of the year! Stay warm and cozy, have a wonderful weekend~ 

Friday, January 17, 2020

Booth Garland

I'll admit... I've been wanting to make a garland for me for years.  I have not made the time for it.  When I realized the almost 3 feet of space at the top of my booth was going to drive me crazy, I decided now is the best time for that garland.  So I got started.

My booth is 8 feet long.  I cut a piece of twine 12 feet long so I would have a 2 foot tie and overhang on each side.  Since our daughter is away at college, I used her room to hang it in and just work on it when I felt like it.  I didn't want to rush it... I wanted to enjoy the process and pick out each piece.  I wanted the pieces long so I shot for 28"... but some are 26", some are 32", and that's ok.  That's what gives it character.

It took a few months but I finally finished it recently and took it to my booth for a little renovation.  Our church was throwing away this awesome brick backboard that they used for a Christmas backdrop.  So I climbed in the dumpster and salvaged it. πŸ˜‚ I screwed it right over the existing pegboard.  Two pieces and it fit perfectly.  

I then hung the garland on nails that I nailed into the 2x4's that the pegboard was attached to.  So quick, easy, and painless.

Since I already had an extension cord at the top, all I had to do was plug in the 100 count white cord light set.  Hung my sign back up and I finally have a nice backdrop for my booth... even though I did love the shade of sage green that it was painted.

A fellow vendor asked if I was going to sell this and make another when it sells.  No.  Not this time.  I'm going to keep this one.

This little beauty is full of love and all the types of embellishments that I cherish... lace, velvet, twine, rick rack, seam binding, muslin, homespun, burlap, and daisies. 😍

Now that I'm finally satisfied with the one and only wall of my booth, it's time to focus on the goods.  I'm chalk painting some pieces and crafting with beautiful spring flowers.  Can't wait to add them to this booth.  I have so much fun playing!