Sunday, March 26, 2017

Burlap Bed Skirt

I've been looking at bed skirts for our bed but just haven't come across any that I love.  Also looking for new bedding... which is even harder to find what I want, that I'm picturing in my mind.  So I decided to make a no-sew burlap bed skirt that I came across on Pinterest.  This is the link to the tutorial that I copied:  http://yougotpersonal.blogspot.com/2013/08/diy-no-sew-burlap-bedskirt.html?m=1
Here is what our bed looked like before I started.
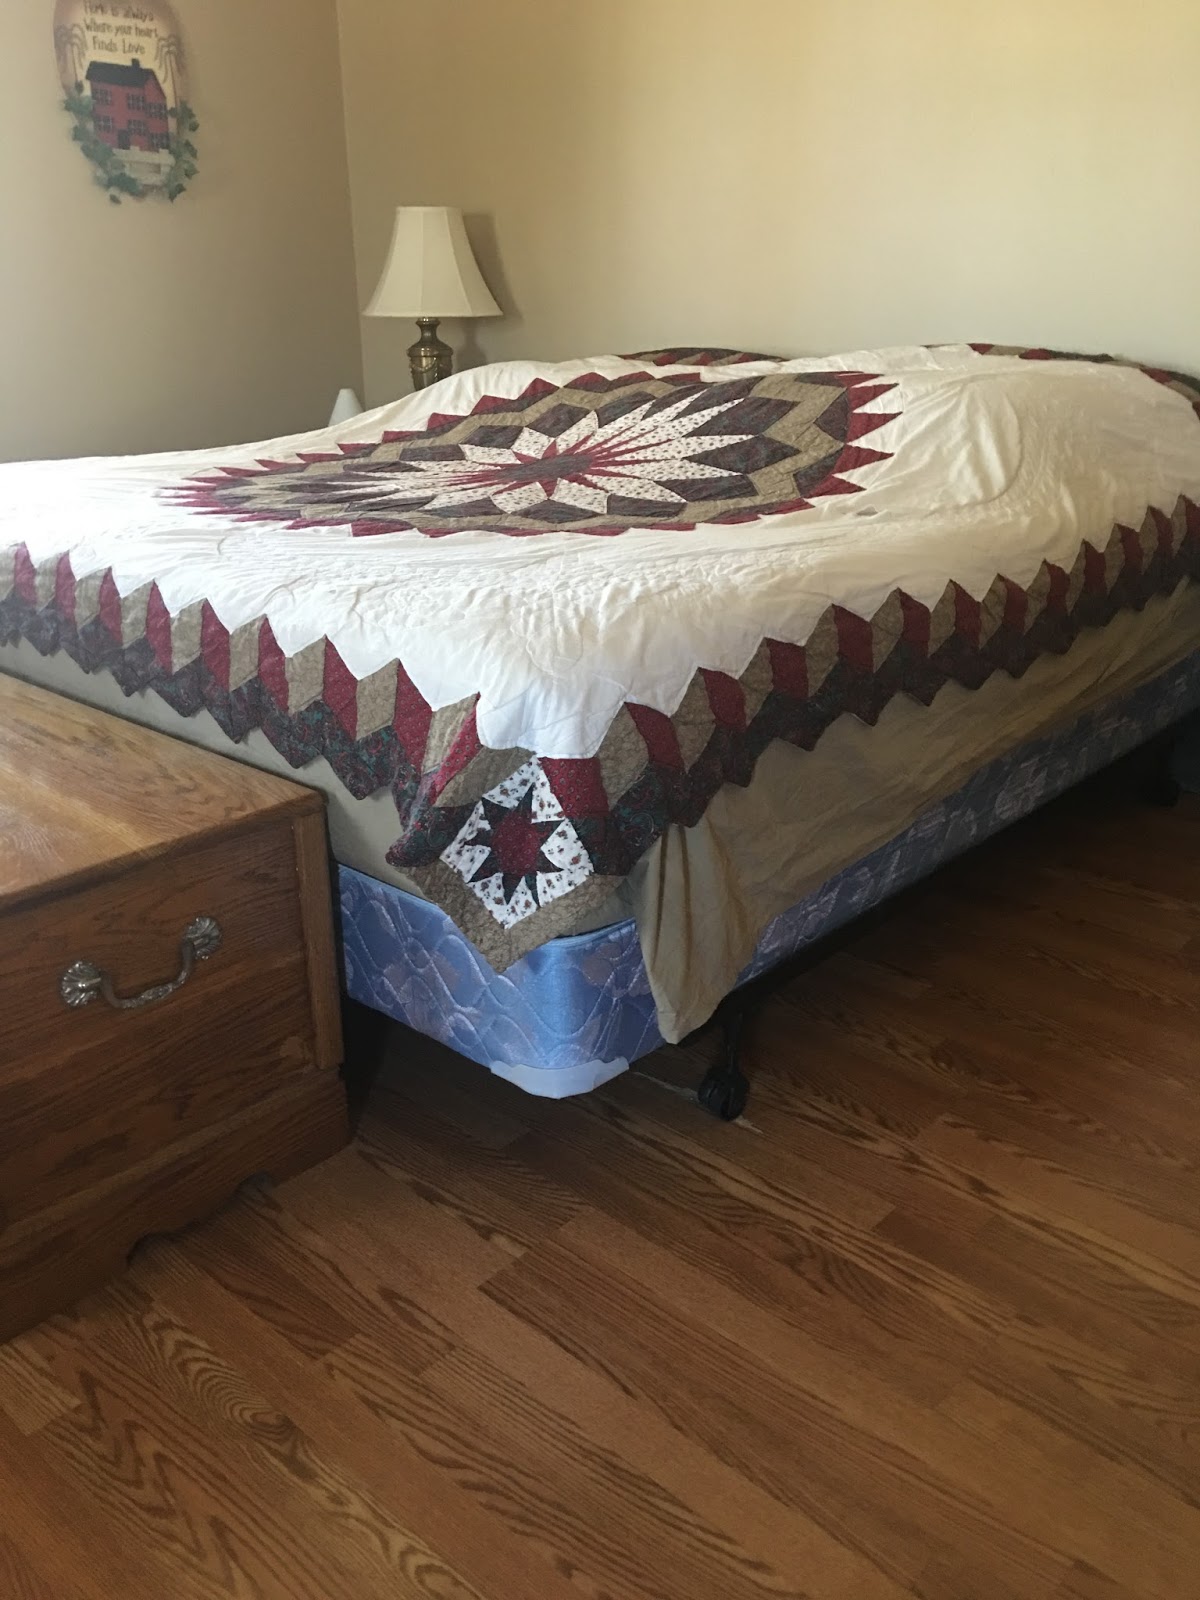
I did this while I was spring cleaning so it was the perfect time to get the dust bunnies and give everything a good washing, along with cleaning the mattress with baking soda.  If you don't do this, I suggest you start making it a habit because it really does freshen up mattresses.  Spread baking soda on a mattress and leave on for about an hour.  Then vacuum off.  Doing this every 1-2 months supposedly kills off dust mites too.  

I'm cheating here and telling you that you need to go to You Got Personal's tutorial page to figure how much burlap you will need.  I was blessed with a huge roll of burlap (free!) but it was cut differently so the webpage dimensions didn't help me... which meant I had to figure the math on my own, darn it.  I laid the burlap out on the floor and cut the length of the piece that I needed.  If you don't know the quick and easy way to cut burlap, here is a link that is a huge help:  http://www.craftaholicsanonymous.net/secret-to-cutting-burlap-straight-and I'm telling you, when I discovered this simple tip, I was amazed at how much more I loved burlap and used it more often, haha!  It can be some serious messy stuff sometimes.  


The tutorial called for upholstery pins so not thinking, that's what I bought.  But they are similar to tacks and will not stay in the box spring.  T-pins are what you need.  I used the longer ones, 1 3/4".  Being ocd, I used a tape measure and measured 8" from fold to fold.


I was honestly amazed at how quick this project went.  Seriously two hours total from start to finish and that even included putting the bedding in the wash, taking the mattress off by myself, sweeping the dust bunnies that were living under the bed, pinning the burlap to the box spring, and putting the bed back together!


Best of all... this project only cost me a couple of dollars for the T-pins because I was gifted the burlap.  When my husband saw it and was praising how wonderful it looked, I sweetly mentioned to him that he can take me out to dinner with the $$ I saved, hehe!


Now if only finding the bedding that I have pictured in my mind was this easy, I'd have it made.

Wishing you all a wonderful week ahead!  I'll be busy with my HS Sr daughter playing in 2 golf tournaments and weeding another flower bed... thankfully we have nice weather in the forecast.  

Thursday, March 23, 2017

Decoupaging a Hat Box


I picked up a fairly old hat box at an estate sale that was loaded with vintage sewing supplies.  The box itself wasn't vintage and I knew it wouldn't sell so I decided to decoupage it.  These napkins were picked up at Dollar Tree at a different time than the box... just waiting patiently to be used with Mod Podge.

I started with the lid.  I put Mod Podge around the lip of the lid, then set the napkin on that so that the edges were even.  Then on the other edge once it was dry, I cut it straight because I didn't want to tuck any underneath the lid.  If there's too much material between the lid and the box, it's tight to open and close and will eventually tear even though the napkins are sealed. 


So the top of the lid looked like this once I got the sides covered.  Do you see how there is a slight gap between the napkin and actual lid?  You won't have this when it is finished.

I cut the napkins apart in sections where the creased lines were.  Then I started brushing Mod Podge on top of the lid, layering pieces of napkins slightly overlapping as I went.


This is what the lid looked like once it was covered.  I did not fold over any of the napkins onto the side.  I cut them straight across the lid.  You'll see in the finished box...  you won't even be able to tell that they are not touching, the small gap that is there, or the slight overlap from a cut that is not perfectly straight.  It will have a complete covered look.


Once the lid top and sides were covered and the excess cut off, I brushed a layer of Mod Podge over the top.  What I love so much about this product is that it acts as a glue and sealer all in one.  One product for the whole project-- perfect.

The box itself was actually easier to cover and went much quicker.  Isn't it funny how that worked out.  Napkins are super thin and tear very easily where scissors would normally be needed... as in the second picture around the eyelet.


Once the box was covered, one coat of Mod Podge was brushed on top to seal the napkins.  I brushed the glue on a little thicker than normal and the end result is a slight texture.  When you rub your fingers across the box, you can feel little bumps.  This adds to the vintage look that I was going for.  You can see this texture a little bit in a few places in this close-up.

As you can tell in these last two pictures... once the edges were sealed with the Mod Podge, you can't even see the gap or slight overlap of the napkins.  The glue seals the napkin edges to the box.


The main thing to remember about decoupaging is thickness.  This means the thickness of the material you are using, and the thickness with which you apply the Mod Podge.  It is a lot like glue in that it will make paper buckle and pucker, especially thinner paper such as napkins or tissue paper.  Depending on the finished look you are desiring, you would normally go with a light coat of Mod Podge.  If you are decoupaging heavier material as in fabric, you can get a straight, even lay.  You would obviously need a heavier coat of glue than super thin material and you would just slightly push down and rub out the bubbles as you go.

What's really fun about decoupaging is that the possibilities are endless!  You can use Mod Podge on just about any surface and you can use almost anything to cover with.  There is a variety of finishes to choose from.  But I'm old school and still use the same finish that I have for years... matte.  I hope you see how easy it is to turn something drab into a pretty piece to display in your home, and it's fun in the process!  

Tuesday, February 28, 2017

Cleaning My Junk Room


I spent eleven full days in January working on my junk room.  From the time I woke up till the late time that I went to bed.  There were 3 nights that we had ball games.  But other than that, every minute except for eating was spent on this disaster.  I always said I would never, ever show my mess on any kind of social media.  Well... now that I'm done, I want to show it off because unless you see the before, there is no way you can appreciate the after.  It's still a work in progress but as you can tell in the pictures, I haven't been able to work on anything in over two years! I just added pile on top of pile.  Talk about an overwhelming task.  Geez.


This is actually behind my table where I used to work.  I couldn't even step foot in here.  Yikes!


I started with one wall.  It took two full days and I wanted to give up.  No joke.  But I preserved.  My oldest was gone for 10 days.  So on the morning that he left, I set up a table in his room and just started moving things to the table, then the couch in his room, then the floor.  This is in the process.

I tackled one wall at a time.  By the time I finished the third wall, I was completely exhausted.  I really, really wanted to give up.  But what I did instead was just walk around my room and admire what I had accomplished so far.  It seriously gave me the motivation to keep on working.  My oldest came home on that 10th day and I still had the table set up in his room but his couch and floor were clear.  On the 11th day, I finally finished.  But oh my, what a chore! 

My junk room is in the library for now until one of the kids moves out.  I'm working on that, hahaha!  

Hmm... now that the junk is off the floor, you can see carpet stains.  Oops!

This is uncomfortable for me to share my mess.  It is actually downright embarrassing.  But I am always inspired by "Before" and "After" and I hope that I can inspire someone.

In the end, I am very well pleased with the results!  I have been able to walk in my room and create again!  I have been ecstatic!! 

I'm in the process of spring cleaning our home so I have less time to play in my junk room.  But every single day I at least go in and spend a few minutes... if nothing else but admiring all that hard work.

Monday, January 2, 2017

Changes...


You know how you just feel like you're in limbo?  Not sure what you're doing or where you're going?  I'm pretty sure I've been on that ride for the past couple of years and never realized it until recently.  If I was really honest with myself, I'd say more than a couple of years.

I've been cruising through life at lightning speed.  Everyone smile big... let's get that photo to document what we've done and let's get moved on to the next.  

I'd say it's past time to slow this life down and actually enjoy it... the bad along with the awesome.  I'd say it's time for some overhauling to commence.

But... where to start?  Overwhelming it is.  So many areas of my life need this.  Decluttering.  Tonight I started with social media.  It felt so freeing to let go of things and people that wear me out, bring me down.  

A good start.  A very long way to go.  But... I am determined.  And you don't stand in my way when I'm determined.  

My wardrobe.  Why do I feel the pressure from family and friends to stay on top of the trends?  That's not me and never has been.  Comfort... that's what I am all about.  My favorite outfit at this time is cropped jeans, faded red Pops shirt, flannel, and converse.  That is where I feel the most like me, comfortable and that's the direction my closet will be going.

Our home.  It will see many changes come its way.   I've loved the dark primitive colors for many, many years and never saw myself changing.  Not white.  Definitely no white in this home.  Yet... something is drawing me to that chippy white farmhouse look.  When I think too long about it, or look around my home... it almost scares me to think of such change.  At those times, I go to Pinterest for inspiration.  Those dark and muted barn reds, mustards, and blacks are giving way to aqua, red, and white.  

The journey.  A Vintage Journey... how appropriate for my business name that I created in 2015.  I was searching back then but going in circles.  It is most definitely a journey I am on.  A mission.  

I am not one to make resolutions or even set goals.  When I finally decide in my head and in my heart what I want, then I work on fulfilling those desires.  But there is just something freeing, uncontested about a new year... new ideas and new plans to birth.

And it starts now.


Tuesday, June 21, 2016

Old Wagon Planter

Better late than never, right?  Finally having time to play around in the yard.  Rich was pulling metal out of the shed to scrap and came across this old broken wagon that was left behind when we moved in 10 years ago.  

I planted pink SunPatiens and white Impatiens in it.

  He is actually the one that said hey, let's save that and plant flowers in it.  Glad he did, it sure makes a cute planter to stand in front of the bird feeder stand.

It's officially summer!  Have fun playing in the sun and make some fabulous summer memories!

  ~ Enjoy your journey ~ 


Monday, April 4, 2016

10 Years of Blogging

a snowy day in spring


Ten years ago today... this was my very first blog post.  Boy have I come a long way, lol!  I had just bought my first dslr camera and I wanted to share my pictures.  So I started my blog 'Ramblings From A Grateful Heart'.  Actually back then, blog titles weren't needed.  It was just pictures I took with a catchy (ha!) caption.  I started getting a little braver and shared more... to the point of me when you meet me in real life.  So I named my blog.  Yes, it's true.  I am a rambler.  Not that I need to hear myself talk, I actually don't like that.  It's just that I always have a lot to say.  It's when I'm quiet that you better watch out, lol!  So I spent years blogging about my family and life in general.

Then in 2010, I discovered the prim blog community and really fell in love with blogging!  So I started a new blog called 'Berry Homespun Primitives'.  I met some incredible women and we all shared the same love of primitives.  My family couldn't (and still can't) understand how I had so many online friends that I've never met.  Even though a lot has changed in the prim blog community, I still think about my old prim friends and wonder how they are doing.  
And even I have changed.

Last year, I made a new business venture move and started yet another blog.  Which brings us current with 'A Vintage Journey'.  A lot has changed in my own personal life with kids growing up, and with me having a seasonal job... I am now able to get back to "me" and doing what I love to do.  In this new season of my life, it is a new journey for me.  What better time to start anew, fresh; right?  It's just so weird to start over again with very few followers, lol!  But we always have to start somewhere.

So, for those of you who have befriended me in the past ten years, THANK YOU for being a friend and thank you for sticking with me  =]   I'm excited to see where this new journey takes me and looking forward to making many more new friends along the way.

~ Enjoy your journey ~

Friday, January 15, 2016

Tea Dyeing

I've been tea dyeing.

I bought a bunch of old flash cards at garage sales and most of them were stained.

We all tea dye for different reasons.  I like the warm, antique look of something that has been dyed.

But the main reason I do it is because it's wonderful at masking those stains.

So at 3:15 am yesterday, I was baking tea dyed flash cards in the oven on 200 degrees for about 5 minutes, just long enough for the heat to dry them so the wet cards would not mildew.

Once I started, I had to keep going till I got to the end of the stacks.  It was like an assembly line so it went pretty fast.

The edges like to curl up a little.

So that's when the heavy crock came in handy.

I normally leave the whole stack under this crock; then separate them individually and put them at the back of heavy books.  Linens are so much easier because all that is involved is throwing them in the dryer, then iron.

This is a large lace tablecloth that I bought at a yard sale for only $1 because it was stained.  I think it will be a nice enhancement to my booth table as I drape it over a tea dyed sheet that is used as a table covering.  I let it set overnight and it became a little darker.

It's funny.  I've been tea dying since the 80's and I still do it differently each time.  I never measure.  I fill my 25 cent yard sale stock pot up with what looks like a good amount of water then I start plopping in bags of Dollar Tree tea bags.  Sometimes I throw in some instant coffee.  Most times I add splashes of vanilla.  Every once in awhile I'll add dashes of cinnamon.  Kinda like Grandma Goins taught me to cook.

While I do enjoy tea dying, I don't do it very often.  I stockpile all kinds of things that need a good staining.  Then make a day of it... or in this case a night of it.  I didn't quite make it to the booth tags, only about a dozen.  So they will be up tomorrow.

I was disappointed in how light the tags were when I pulled them out but once I put the new tags by it... they don't seem so light.  And the tea dye always darkens as it dries.

If you haven't dabbled in tea dyeing, I suggest you start.  It gives a beautiful and warm antique patina.  I have saved so many linens that were destined to the trash because of stubborn stains that just will not come out.  The tea dye really does mask those stains.

My first show is less than 2 months away.  These flashcards will be displayed in wire baskets with 3 for $1.00 signs clipped to the sides.

Will be moving on to the next project once the tags are ready to go.  Thank you kindly for stopping in for a visit.

~ Enjoy your journey ~